Category Archives: Cake
the magical fruit

For once in my life, I am not talking about the most fantastic yellow pineapple. Today, I must impress upon you the magical powers of bananas.
Bananas are awesome. They’re delicious, healthy and can be used for almost everything.
Did you know that bananas are super high in potassium? For you non-biology HLers, potassium is really important for neurotransmission and water regulation. As a result, it reduces strokes and even blood pressure! They up your brain power, so they’re the ideal food for exams – not to mention they’re conveniently packaged into a squishable container.
You may also have noticed that bananas resemble a…umm, certain organ below the torso (hint: only half of us have one). Yup. Bananas are an aphrodisiac too.
Even though they don’t look anything we’ve got, bananas are awesome for us, girls – particularly during that time of month. The water regulating benefits prevent bloating and the plentiful iron wards off anaemia. Besides all of that, the fact that they’re packed full of vitamin B6 means that it regulates our glucose and keeps our spirits up (with some help from tryptophan, but more on that next time). This means that when you eat a banana, your mood suddenly perks up and your cramps hurt less! Hurrah!
Besides being calorie-free, the only thing that could make bananas better for us girls is if you could somehow, just possibly, combine bananas with chocolate.
Oh, wait. You totally can. All you need is some chocolate banana cake.
Chocolate, bananas and cake? That’s practically a 3-in-1. There isn’t no deal better than that.
First, you have to mix some cocoa powder with hot water and leave it aside, while you deal with the bananas. It’s alright, we’ll come back for His Royal Deliciousness (and now, we are not talking about Prince Will. The baldness is just so off-putting).

However, I regret to announce that you will need a blender for this recipe. But washing the blender is much more preferable to using a fork to mash bananas in a super smooth…er, smoothie.

And look! Yoghurt! Lovely, plain yoghurt which is full of calcium. That’s also good for you, right? Just chuck your bananas and yoghurt into your blender and mix, mix, mix.
By the way, did you know that the stringy stuff between the peel and edible banana is the phloem?! Completely mad, I know. Put your hand up if you understood what I just said. Put on your nerd glasses if you’re amazed.
Thanks for making me feel better about my geekiness (:

Now you can throw in your cocoa mixture. Personally, this reminds me of Art Attack, no?
And after that, chuck in some eggs (one by one!) and vanilla extract. This is easy-peasy, don’t you think?

Now in a giant bowl, sift together your flour, sugar, salt and baking powder and soda. Using a stand mixer or handheld mixer, mix it just enough to blend it together.

Now add in your softened butter. Erm. Yeah. For all of you who had a heart attack just looking at this picture, don’t worry! We only need to use, uh, two thirds of that. Hey. It’s a BIG cake, alright?

Don’t forget about the yummy banana-chocolate mixture we just made! You need to add that too. It’s the most important part!
Now it’s time to beat this pile of ingredients into a delicious cake batter! As a leader for all the lazy people out there, I used an electric mixer.

I took a quick taste test to check for deliciousness factor. Definitely there.
Once your batter is smoothity smooth, pour it into your pan and bake for waaay too long, while the mouthwatering smell of banana and chocolate wafts through your entire house.
When cooked, let it cool completely and decorate it however you like. I opted for a dark chocolate ganache (of course) to emphasise the chocolate flavour. There is no such thing as too much chocolate, people!
So, ladies and gentlemen, I really recommend, no – demand that you make this cake.
Make it for the suffering girls. Make it for your friends, your family and even your dog.
Or maybe, you can make it for someone you really care about. For a special occasion.

Chocolate Banana Cake
Adapted from Rose’s Heavenly Cakes by Rose Levy Beranbaum
Ingredients:
- 1/2 cup + 1 tbsp (42g) unsweetened cocoa powder
- 1/4 cup + 2 tbsp (3 fl oz) boiling water
- 1 large banana, peeled and lightly mashed
- 1/4 cup + 2 tbsp full fat, plain yoghurt
- 2 large eggs, room temperature
- 3/4 tsp vanilla extract
- 1 1/2 cups (100g) cake flour
- 1 cup (200g) caster sugar
- 1 tsp baking soda
- 3/4 tsp baking powder
- 1/4 tsp salt
- 10 tbsp (142g) unsalted butter, room temperature
Method:
- Whisk cocoa and boiling water together in a bowl until smooth, then cover with plastic wrap (to prevent evaporation) and cool to room temp for 30 min (or put in fridge to quicken the process).
- Preheat the oven to 175°C (375°F). Grease and flour a 9 by 2-inch round cake pan.
- Using a food processor, blend the banana and yoghurt together until smooth. Add in eggs one-by-one, cocoa mixture and vanilla extract, pulsing inbetween each addition.
- In a large bowl, whisk together flour, sugar, baking powder, baking soda and salt with an electric beater for 30 seconds on low (or mix by hand).
- Cut butter into small cubes, and add to the flour mixture. Pour in half of the banana-cocoa mixture. Mix on low speed until all dry ingredients are moistened, then raise speed to medium and beat for 1 1/2 minutes. Scrape down the sides of the bowl.
- On medium-low speed, gradually add the rest of the banana-cocoa mixture in two parts, beating on medium speed for 30 seconds after each addition. The batter will be light and creamy.
- Scrape batter into pan and flatten top with a spatula or knife. Bake for 35-45 minutes, or until a toothpick comes out clean and the cake springs back when pressed lightly in the middle. While cake is baking, make your ganache.
- Let the cake cool in the pan on a wire rack for 10 minutes, then invert onto the wire rack and cool completely. If your cake is domed, re-invert your cake again to prevent splitting.
Dark Chocolate Ganache:
Ingredients:
- 227g dark chocolate (60%-62% cocoa)
- 1 cup heavy cream
- 2 tsp vanilla extract
- 2 tbsp Kahlua or Baileys (or choose your own liqueur)
Method:
- Cut chocolate into tiny pieces or pulverize in food processor.
- Scald cream in a small saucepan – do not boil!
- If cutting chocolate: put chocolate in a large bowl, pour the scalded cream, vanilla and liqueur in and leave for 1 minute, then whisk (by hand) until smooth, avoiding incorporating too much air.
- If using food processor: pour scalded cream into the running food processor in a steady stream and process until smooth. Pulse in vanilla and liqueur.
- Cover with plastic wrap and cool to room temperature, until it is of frosting consistency.
- Decorate your cake!
remake of a classic

Remember that delicious, fragrant orange yoghurt cake?
Yes, that one. Think of this as a sequel. But a good one. This isn’t High School Musical 2, here. This cake is totally like that one. But grapefruit. Like it’s supposed to be.

Speaking of things that are supposed to be, I think this zester and I are supposed to be. Sorry, Gabriel.

And it turns out that bald grapefruits are just as funny looking as bald oranges.

And just check out that pile of zest from one grapefruit. I’m loving grapefruits already.

Lick. Me.
Go on. I dare you.

Every baker knows that the number of eggs is directly proportional to the yumminess of a cake.
Now that’s math for you.

Which makes the deliciousness of this cake batter 8.16 x 10^3.

Express this as a chart? Percentage of cake that looks like Pac man…all of it.

Super easy and delicious. Enjoy it with a cup of coffee. And if you aren’t a fan of coffee? Then, enjoy it with a cup of coffee anyway.
Seriously. Coffee is amazing.
But in all seriousness, this cake is just fragrant and delicious as the other one, but more zesty, I would think. So it’s more bitter and face-scrunchy than if you used oranges.
So, go on. If you’re a sissy, make the other cake. Otherwise, here’s the recipe for this one.
Gâteau au yaourt et au pamplemousse
(Grapefruit Yoghurt Cake)
Adapted from Foodbeam
Ingredients:
- 1 1/2 cups flour
- 250g plain yoghurt (yaourt nature)
- 1 1/2 cup caster sugar
- 1 1/2 tsp baking powder
- a pinch of salt
- 3/8 cups vegetable oil
- 3 eggs
- zest & juice from 1 large grapefruit
Method:
- Preheat oven to 180°C. Grease and flour an 8-inch springform pan.
- In a large bowl, sift together flour, sugar, baking powder and salt. Stir in plain yoghurt.
- Pour in oil & eggs, beaten. Add in zest of grapefruit. Mix until combined and lump-free.
- Put mixture into prepared pan and bake 30-35 min or until a skewer comes out clean.
- Cool, then squeeze juice of remaining grapefruit over the cake.
Serves 8
brownie mosaic cheesecake, part 二

The reason I baked a packet mix the other day, or joining “the dark side” as Alan affectionately called it, is because it was part of a bigger picture. Juggling the ridiculous mountain of Biology past papers and baking, it seemed like a good way to use up some brownies and time. So what is a brownie mosaic cheesecake?
A brownie mosaic cheesecake is…a toasty caramelly-digestive biscuit base, topped with a fluffy vanilla cheesecake with – hold your horses! – an abundance of fudgy, brownie chunks floating in it. The result? One pretty damn orgasmic cheesecake.
It’s time to get down to some serious business. Put on your apron, tie back your hair and roll up those sleeves. We are going to…take out your cream cheese and yoghurt from the fridge. You want to let them warm to room temperature before we do anything because cream cheese hardens really easily.

Now we begin. You want to get some digestive biscuit first. I’m sure an oreo or chocolate biscuit base would be equally blissful, but nothing carries a toffee-like flavour like digestive biscuits do. So there. I used about 175g of digestive biscuits for this crust. If you’re one of those people who absolutely love crust, like me, you can double the crust for a doubly delicious cheesecake. Damn. I should have done that.
Anyway, select your weapon of choice. I decided that the meat tenderising hammer was a good way to smash some biscuits to oblivion.

But then I felt that my gigantic mixing bowl’s life was in danger, so I settled on a much less threatening wooden rolling pin.

Of course, you could just chuck all of it into the food processor but I really cannot be bothered to wash that thing, so instead, I spent a good 10 minutes smashing biscuits into crumbs. Did that not make sense? Get used to it.

Once your biscuits are sufficiently crushed (chunks are cute too!), chuck in 3 tablespoons of fine brown sugar. Then melt 2 tablespoons of butter and 2 tablespoons of black treacle in the microwave. Do this in little increments of 5-10 seconds because if the treacle boils…well, good luck. Vaguely whisk this mixture together, even though it really doesn’t want to and pour it into your biscuit crumbs (Hulk! Smash!). Mash the mixture together with a pinch of salt until it’s nicely blended and there are no pebbles of brown sugar.

Tip this into your prepared pan. I used a 9 1/2 inch springform pan, but a 9 inch springform would also work. It might be a good idea to grease the sides of the pan. I didn’t, and it came out absolutely fine – just not as pretty as it could have been. Press the crumbs into the base of the pan until there are no gaps and it’s nicely compressed. Loose bases are not cool. Like how if I decided to chainsaw through the foundations of your house, causing a collapse, it would also not be cool. (:

Chuck this into an oven preheated to 175 C for about 10-12 minutes, until it smells DELICIOUS! Take it out and let it cool completely before filling.

…Meanwhile, we’re going to make the cheesecake filling! To make this recipe all that much easier, I chose a really really easy cheesecake recipe. All you do is cream your…cream cheese until it’s nice and fluffy. Then add your sugar and salt and cream that in too.

Basically, cream your mixture after every addition of the following.
Eggs. Vanilla. Yoghurt.

I recommend using full-fat sugar-free yoghurt, by the way. The imported kind. Carrefoure carries it in several brands and they’re all okay for this recipe. The reason I use imported yoghurt is because the texture is more pudding-like, unlike the liquid, sugary Chinese yoghurt.

Can you believe it? You’re almost done already! Chop your brownies roughly to about 1cm cubes and scatter them evenly on your pre-baked crust. Then pour your cheesecake mixture over the top and wiggle the pan about to get the batter around all of the brownie chunks and up to the sides. Bake this for 25-30 minutes in an oven preheated to 175 C, then very quickly rotate the pan 180 degrees and turn off the oven. Without opening the oven door, let the cheesecake sit for about 40 minutes. Carefully remove the cheesecake from the oven and leave it outside for a while. Cheesecakes crack because of sudden temperature changes, but while it’s outside, it’s at risk. While the cheesecake is baking, you should take advantage of the time and prepare a fort and armed guards to protect your cheesecake. When your cheesecake is cool to the touch, you can move it to the fridge.

And that’s it! Now, you can all be jealous of my delicious cheesecake.


See you next time! (;

And that’s the end of my Biology mountain, too!
Brownie Mosaic Cheesecake
Brownie
Use your favourite brownie mix, or wait for my upcoming low-fat brownie recipe!
Digestive Biscuit Cheesecake Base
Ingredients:
- 175g digestive biscuits
- 2 tbsp (30g) unsalted butter, melted
- 2 tbsp black treacle
- 3 tbsp brown sugar
- Pinch of salt
Method
- Preheat oven to 175 C.
- Using preferred weapon, crush biscuits into crumbs in a medium bowl.
- Add the brown sugar and salt to the crumbs and stir to combine.
- Melt butter and black treacle together in the microwave, whisk gently, then pour into crumbs.
- Stir until well combined, then press firmly into the bottom of a 9 or 9 1/2 inch springform pan.
- Bake for 10-12 minutes. Cool completely before using.
Vanilla Yoghurt Cheesecake
Adapted from Baking Bites
Ingredients:
- 150g unsalted cream cheese, room temperature
- 350g plain yoghurt, room temperature
- 3/4 cup caster sugar
- 3 eggs, room temperature
- 2 tsp vanilla extract
- Pinch of salt
Method:
- In a large bowl, beat cream cheese using a stand mixer on medium until light and fluffy. Approx 1 min.
- Add sugar and salt beating until well combined. Add eggs, vanilla and yoghurt, beating well after each addition.
- Blend mixture until extremely smooth, then pour into a 9 or 9 1/2 inch springform with pre-baked base.
- Bake for 25-30 minutes, then very quickly, rotate the pan 180 degrees. Turn off the oven, and without opening the oven door, let cheesecake sit for about 40 minutes.
- Let cheesecake cool for at least 2 hours before moving to the fridge.
a very Berry Buttermilk Cake

Oh, I’m so far gone.
One of the things I love about being on holiday is the sudden abundance of great cereal. Cinnamon Toast Crunch? Honey Clusters? Coco Pops and Fruit Loops? I’m putty in their sugary hands.
But for some reason, when I reached the cereal aisle in the reasonably large Cold Storage, I ended up reaching for the only cereal (well, muesli) with no added sugar.

Whaaat??
I think eating healthier has just been ingrained into my brain now (excluding cakes, of course). Or maybe I’m feeling bad for eating all that food in the UK… Either way, it’s a good thing. And it doesn’t even feel like I’m trying to be healthy. I actually really think the muesli tastes good! It’s awesome with some creamy strawberry yoghurt piled on top. Unlike some other cereals –cough cornflakes cough-, it stays all crunchy and has yummy sultanas and nuts in it (For all you nut haters: I don’t care. All the more for me!)
Another thing I love is when fruits suddenly go into season and it so happens that it’s currently cherry season. The US must have had one hell of a bountiful harvest this year because cherries are hitting the shelves at a REALLY low price, even here in Singapore where food is more expensive because they all have to be shipped in (too small to grow food! Haha!).
I had a lot of leftover buttermilk from a chocolate cake that I baked earlier. I was super excited about using buttermilk because they don’t have it in Shanghai, so I use a substitute of lemon juice and milk.
Let me sum this up for you in a simple equation.
Cherries + Buttermilk + Lots of Love
=
a very Berry Buttermilk Cake + More Love
I love this cake. Surprisingly enough, so does my dad, and he doesn’t even really like cake (the horror, I know). I guess it’s because it’s not one of those decadent triple layered chocolate cakes that you have to attack with a big glass of milk. Nope, it’s one of those light, everyday cakes (a great idea, no?). It’s perfect with something so simple as a latte or a cup of tea. This means that it’s totally justifiable to have for breakfast.
Besides, it’s really lovely and soft. The texture is really springy and it just tastes like summer.
Luckily for you, I am all about the simple this summer. Most likely because I’m stuck here with only a whisk and spoon to help me. This means that you have NO excuse not to make this cake! Get your chef hats on, people!
(As usual, recipe at bottom)

Step one. Find some cherries. It doesn’t matter if they’re Rainier cherries or your normal cherries. Heck, they don’t even have to be cherries! Go for any berry you like! Raspberries, blueberries, gooseberries (which don’t actually look like geese) or even a handful of each. Just make sure you wash them!
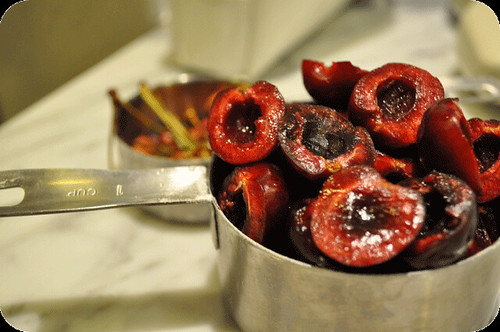
Step two. Start pitting and halving your cherries. There are cherry pitters out there that pop out your cherries nice and whole-like but I feel that it’s an unnecessary piece of equipment that most people will use about twice a decade. Instead, I use a small sharp knife and holding the cherry in my left hand, cut down the centre of cherry all the way around. Then use the knife to pry the halves apart which comes out pretty neat. Then use the point of the knife to dig out the pit. This kind of takes a while, so I wouldn’t start pre-heating your oven until you’re done.
If you’re using strawberries, make sure you hull and half them (quarter if they’re large). As pretty as the green and red would be in a cake, you won’t appreciate it nearly as much when you have a mouthful of strawberry leaves. You’re going to want about one cup of berries. I opted for a heaping cup because I’m all about over-the-top.

Step three.
Preheat your oven to 200 degrees Centigrade (400 Fahrenheit). Then butter and flour a 9 inch round cake tin.
Measure and sift together one cup of flour, and half teaspoon each of baking powder and bicarbonate of soda. Add a quarter teaspoon of salt and whisk them together with…well, a whisk.

Step four. Cream together 56g of butter and two thirds cup of caster sugar. You want to beat them together really well until it’s light and fluffy.
Tip: If you’re beating by hand and you’re getting really annoyed with the bowl shaking and the repetitive sound of it hitting the counter, tightly wrap a kitchen towel around the base. It solves all of your problems (except for the sore arm. Sorry!) 😀
This whole creaming thing is much much easier with a beater or stand mixer, but hey! It’s exercise. But if you’re at home and making this with an appliance, beat it for about 2 minutes.
Okay, this step is super duper important as this is one of the reasons your cake is going to be fluffy. The sugar punches holes into the butter which is why it pales in colour and makes your cake all airy. It pretty much sets up the structure. However, this is not as important in this cake as other cakes because there are other helpful factors.

Step five. Add in a half teaspoon (feel free to add more :D) of vanilla extract. None of that flavouring! PUT DOWN THAT BOTTLE! It’s bad for you! Plus, it doesn’t taste nearly as good.
If you’re adding lemon zest, add in a half teaspoon of the finely grated stuff now! I didn’t because I didn’t have a lemon…or a grater.
Anyway, mix it all up until it’s evenly blended.

Step six. Okay, this is the kind of scary part. It’s easy…but will probably scare you half to death and gross you out at the same time. So basically, just crack your egg into the butter and sugar mixture and beat well.
Why is it scary? Well…because when you start mixing it all up, it kind of ends up looking like…

this.
Yes. It looks absolutely disgusting. I would not eat it, Sam I Am.
Well, don’t give up. Just keep beating it and beating it and beat it *cue Michael Jackson* some more. Until it looks like something more edible. Here, I’ll even hold your hand through the process. (:

See? That looks WAY better. Smells good too. Just like real vanilla.

Step seven. Now you’re going to add your flour mixture and buttermilk into the butter and sugar. You’re going to want to add the flour in three parts, alternating with buttermilk. Flour should be both the first and last in the order. So to make that simple, it goes flour, buttermilk, flour, buttermilk, flour.

So first, add just one third of your flour mixture in. This is called tempering which tempers your mixture so that you don’t overload it with flour which can make it really lumpy…which as you know, I absolutely hate.

Stir the mixture until it’s just combined. That means no overbeating! It’s okay to stop when you still have a couple streaks of flour left.
The main reason you don’t want to overbeat the mixture is because it encourages the formation of gluten and too much of it will give your cakes the same texture as Hagrid’s (delicious, I’m sure) rock cakes.

Then add a quarter cup well-shaken buttermilk. I just measure out a half cup, then splash approximately half of it in. Mix until just combined again.

Now it’s time to add the second third of your flour in! Once again, not being accurate here. Just kind of slop what you think is about right in. Generally, my first addition is the smallest and last is the largest. Mix until well combined!

Add the remaining buttermilk. By the way, the buttermilk is the reason why you can be slack about creaming the sugar and butter together.
Warning! Simple chemistry up ahead!
Baking powder has an acid AND base, making it useful on it’s own, but baking soda (also known as bicarbonate of soda) is basic. Therefore you have a simple acid + base reaction, releasing carbon dioxide which creates the texture of your cake. Buttermilk is acidic, therefore you get double the boost in making a lovely fluffy cake!

For the last time…mix until just combined. Relieved? Me too.

See how yummy it looks now??

You’re almost almost there now! Just plop all of the batter into your prepared pan. It’s thicker than the usual batter, so use a knife or spatula to even it out.

Spread it right up to the edges because otherwise you might get a more domed cake. I don’t know about you, but I don’t like domes unless they’re on cupcakes. Then they’re just cute (:
All you have to do now is arrange your cherries or whatever berries you’re using on the batter. I put my cherries hole facing the ceiling because that way, they’re less likely to sink into the batter. I really want them to stay in their pretty formation. You can do whatever design you want, but I went for an encircled star (:
Maybe you can do a heart for Valentines day or a Christmas tree or just chuck them everywhere.
When you’re finished plonking cherries onto your batter, take 1 1/2 tablespoons of sugar and just sprinkle it evenly all over the surface of your cake. I have forgotten this step both times I’ve baked this cake and ended up risking my hand in 200 degree ovens attempting to sprinkle sugar 10 minutes after baking.

When you’re done designing, put it in your long pre-heated oven and bake! I love how it puffs up so much . It reminds me of clouds 😀 Yummy…cherry flavoured clouds…mmm…
It does look very puffy right now, but it’ll deflate a bit when you take it out of the oven. You’ll be able to see that there is no sugar sprinkled on my cake. This is because I forgot. Yet again. But I realised my pitiful mistake minutes after taking this photo and risked my limbs to correct my mistake. I really love the idea of sprinkling sugar on top though. It makes this yummy golden sugary crust that crunches when you bite into the cake. -sigh-. Heaven.
The recipe said bake for 20-25 minutes, but mine was ready at just 18, so start checking early when it begins to golden on the top.

Aaand, you’re done! Cool it for 10 minutes in the pan, tip it out onto a wire rack for another 10-15 min, then slice and eat!
P.S. This cake is totally waistline friendly!
Cherry Buttermilk Cake
Adapted from Smitten Kitchen
- Ingredients:
- 1 cup all-purpose flour
- 1/2 tsp baking powder
- 1/2 tsp bicarbonate of soda
- 1/4 tsp salt
- 1/2 stick (56g) butter, unsalted
- 2/3 cup + 1 1/2 tbsp caster sugar, divided
- 1/2 tsp vanilla (feel free to add a bit more)
- 1/2 tsp lemon zest, finely grated (optional)
- 1 large egg
- 1/2 cup well shaken buttermilk (see tip)
- 1 cup cherries, halved and pitted
- Method:
- Preheat oven to 200°C (400° F). Butter and flour one 9-inch round pan.
- Whisk together flour, baking powder, bicarbonate of soda and salt.
- Beat together butter and 2/3 cup sugar until pale and fluffy. Approximately 2 minutes by appliance.
- Add vanilla and zest, mixing to combine.
- Crack in egg and beat well until smooth.
- At a low speed, add flour in 3 batches, alternating with buttermilk, beginning and ending with flour. (Flour, buttermilk, flour, buttermilk, flour). Mix until just combined.
- Spoon batter into pan and spread evenly.
- Sprinkles cherries over the top, then sprinkle 1 1/2 tbsp sugar all over the surface.
- Bake 16-20 minutes or until golden. Cool in the pan for 10 minutes, then turn onto rack and cool for 10-15 minutes more.
Tip: If you don’t have buttermilk, it can easily be replaced by 1 tbsp of lemon juice, then filling it with milk up to the 1 cup mark. Let the mixture curdle for 10 minutes, then give it a good stir before using.
relax, take it easy

Hey there, friends. It’s been too long, I’m sorry.
Yeah, I know. You, me and everyone else has probably just had one of the most stressful weeks ever. Duke of Edinburgh expeditions…Exam week…Getting results back…
But that’s okay, you know, because it’s over now. It’s the weekend! You should be at home, sinking deeply into your favourite sofa (or blue chair). Those feet should be propped up on the table, too. That’s right, go right ahead (as long as it’s not your dining room table. That’s just plain gross!).
Yes, you should be doing that…unless you’re me. You see, my brother came home again and that means lots of work for me. Lots of dishes to wash and tables to wipe. And lots of food to make.

So yeah, that’s what I’ve been doing all day. I’ve rebounded straight back into the kitchen scene and I love it. Well, except for the washing dishes part. Nothing’s perfect.
But seriously, I’ve made so much food today. I made breakfast…little whole-wheat pancakes. The whole healthy aura was ruined slightly when I mercilessly drowned them in maple syrup. Mmm…maple syrup.
I also made sandwiches for lunch. Creamy crab for my brother, chickens and olives for my mom and good ‘ol ham for me. That’s mine up there. I love it when my food looks like a rainbow. It makes me feel all cheerful and gay. In the cheerful sense. (:
And of course, there was cake. Where would my weekend be without cake? I had some Nutella sitting here at home that was just begging to be used. Hey, it asked for it! And I thought….what goes well with Nutella? Why, chocolate. Everything goes with chocolate. Of course, everything goes with Nutella as well, though I have to say the best way to enjoy Nutella is directly out of the jar with a spoon. Savour it slowly, guys!
I know there are so many people out there who refuse to sift. Why is it such a big deal?? Does it really make a difference? I implore you guys. No! I beg! Please please please sift your ingredients when baking. It makes such a huge difference. Maybe it’s just my overpowering hate for lumps talking, but this, my friends is why we need to sift:

Yeah. Check out that huge ass lump of cocoa powder on the right. That is not something you want to bite into in your cupcake.
“Mmm…delicious…chocolatey…ARHKGAD. UNSWEETENED COCOA POWDER! ARGHA KOFF KOFF KOFF”
And then you would choke to death on the dry lump of cocoa powder. Is that what you want?? You want to die a horrible death choking on your hideous tumour of a lump of cocoa? So be it. Don’t say I didn’t warn you. REFUSE TO SIFT AT YOUR OWN RISK!

Besides, sifting is soo rewarding, especially when you’re rewarded with such innocent little chocolate cupcakes. Oh how naive they are, all unfrosted and such. But that’s going to change…this is a great example of when good goes bad.

Oh, so very bad. You see, chocolate cupcakes and Nutella frosting are the naughty couple of cupcakes. Enough chocolate to be completely and utterly addictive, and the hazelnutty taste of Nutella just gives it that twist that makes it oh-so-much better.

The best thing? These cupcakes are easier than pie to make. I mean this quite literally. Pie takes quite a while to make, you know. So really, it’s been a tough couple of weeks. Relax, take it easy.
With Love,

(It wasn’t me.)
Happy Birthday

Tuesday was Aditi’s birthday.
Happy 17th Aditi!!! 🙂
I hope you had a great birthday!
Each day you become a day older, but today you get to count an entire year. Today you get to eat a fancy dinner with your friends and family. You receive a treasure trove of presents, most of which will be chocolate, due to a slew of unoriginal present givers! You celebrate one more year of being alive…something I don’t quite understand because you’re only a day older than yesterday…but that doesn’t matter because it’s your birthday!
Having a birthday during school must kind of suck. You have to go to lessons and you have to do homework. You have to get up early in the morning and sleep early at night. You have to endure eight renditions of the ‘Happy Birthday’ song sung in varying degrees of out-of-tuneness (I’m sorry!).
But most of all, you get cake.
That night, as Aditi was busy having fun with her friends, Jenny and I were on a top secret mission. What secret mission? The world may never know. It is a secret after all…
…Okay, I’ve cracked. I’ll tell you. For the last week, we had been planning a (dismal) birthday surprise. It involved a little star shaped cake and a big birthday banner and nothing else. Even though we started planning last week, I unfortunately have to say that Jenny and I are the worst party planners ever. From that night, I can successfully say that I will never become an event/party planner, a caterer or most of all, a wedding planner.
If I planned a wedding, the decorations would be made out of tacky-looking foil, the tablecloths wouldn’t match the curtains and the cutlery would all be missing. The only thing that would arrive intact would be the wedding cake. Which costs on average about $550 USD (!), did you know?
Luckily, I’m not a wedding planner and for the better of couples everywhere, I never will be.
So yes, that night Jenny and I (mostly me) trudged out into the cold, dark and rainy weather to surprise Aditi. You see, our problem was that we didn’t actually know where Aditi lived. Yes, she was on our bus, but we didn’t actually know which building or floor. A friend notified me of her building, but inside each building were about 4 other buildings. I made two very awkward phone calls to two friends involving them picking up to hear “This is not Jean. Do not say my name. This phone call is not taking place. Now, is Aditi there?” , but as they were with Aditi, they couldn’t/didn’t know where she lived. Lovely. So we threw a surprise party in the lobby. Haha, we are the best party planners ever. There’s no venue quite like the lobby!
Originally, we had planned to meet at Jenny’s tower at 6:10, presuming Aditi would leave school at 6, giving us 20 minutes before she arrived home. This plan was made while I was in the shower, getting increasingly pissed off at my phone which kept ringing when Jenny texted every 60 seconds, making me step out dripping wet into the cold bathroom. Humph. It was all going good (this was at about 5:50) when I had just blown dry my hair and I received a text from our secret accomplice.
Aditi left 10 minutes early.
NOOOOOOOOOOOOOOOOO!
Snap! Our plans!!! Okay, so several rushed phone calls later Jenny and I we were standing in Aditi’s lobby, very much wet, cold and panicking that she was already home. Jenny made a huge, amazing poster that we held for 20 minutes across the lobby and I made…well, you’ll see.

Introducing the cast and crew of this mysterious production…!
Flour, caster sugar, vegetable oil, oranges, eggs, baking powder and the star: natural yoghurt.
As you can tell from the picture (or maybe not if you’re inattentive), I used two different kinds of oranges. They’re both navel oranges so but the darker coloured one was a local Chinese orange and the lighter coloured one in the front was a Sunkist orange imported from the USA.
This is one of the easiest cakes I’ve ever made. Really. I love it 😀
So first, you take your oranges and zest them! This is the most labour intensive part of this recipe i.e. extremely relaxing. Make sure you wash your oranges first!! You never know what has been on those skins…

Please be more careful than me. I accidentally zested my hand. Twice. I’m not surprised and I guess you’re not either.
Yeah, I have a crappy zester. I really want one of those Microplane zesters that everyone raves about but a 250RMB zester is kind of insane to me.
By the way, when you zest, you only want the orange part of the skin. The whiteish part under the zest is the pith and it has a kind of bitter taste so you don’t really want that mixed in with your lovely fragrant zest.

Okay guys, fess up. I can’t be the only one who finds bald oranges hilarious. I mean, come on. They’re bald oranges!!! 😀 And they look so furry! Resist the temptation to eat the bald, furry oranges of doom. You’re going to need them later!
I couldn’t really tell a difference between the Chinese and American oranges taste-wise, but the Sunkist orange gave a nicer and drier zest that wasn’t as mushy as the Chinese one.

It’s alllll easy from here on. Just sift in your flour, baking powder and sugar. Stir in a pinch of salt.

Let me introduce to you the main character of this production: natural yoghurt. This stuff is from Carrefour as you can tell by the packaging so it’s imported from France. This stuff is really au natural and is really thick and well, yoghurty. Don’t use the local Chinese yoghurt. It’s too watery and has sugar added to it which kind of offsets the sugar balance in this cake.
Teehee, I almost never eat such thick yoghurt in China. I couldn’t resist drawing in it (with a butter knife of course!).

Once you’ve got Mt. Sifton done and sorted, empty two 125g cartons of your yaourt nature into the dome and SMASH the mountain of flour. It’ll look a bit like the crater on the left. Congratulations, you are now a natural disaster to the inhabitants of Mount Sifton. Give the mixture a bit of a stir until it’s kind of even. It’ll be really really dry, but don’t worry about that just yet.

Use your pretty little whisk to beat 3 eggs and 6 tablespoons of vegetable oil until it’s nice and smooth. I used to always beat eggs with chopsticks. I never got why people use forks to beat eggs. It’s so difficult!! But then I started using a whisk and the chopsticks have been forgone. Seriously guys, whisks are the way to go. I have three of them. No kidding. (But one is broken so it doesn’t count!)
Once the oil has been nicely incorporated into the eggs, pour the eggs into the yoghurt-flour mixture. Okay, this is where I started freaking out. I intended to just stir it with my spatula all nice and easy like muffin batter but there were so many LUMPS! ARGHGH!
I got totally freaked out by the huge lump that wouldn’t budge. But it’s okay! It worked out just fine. Just use that aforementioned wonder whisk and manically whisk your batter into shape.

Aaand we’re already at the last step! Pour in your orange zest and gently stir with the magic whisk until just combined.
This part is optional: You can either slice open one of your oranges and eat it, or you can squeeze the juice into the batter. Either way, finish by pouring your batter into your greased and floured pan.

Aww, isn’t it so cute??? Yup, I made Aditi the mini birthday cake up top. I personally found the shape just too adorable. It’s a star shaped cake!! 😀 What’s not to love??
The colour of this cake was just right for it too 🙂

Slide your pan of awesome into the oven and while they’re baking, clean up the mess you’ve made which hopefully shouldn’t be very much at all. While you’re waiting, slice open the other orange and sit down in your dining room.
Soon, the kitchen will smell mouthwateringly like the citrusy scent of fresh oranges. Tangy, but plump and juicy. Mmm… Try not to open the oven just to smell them. Or in my case, try not to open the oven for too long while trying to excavate the little star tin from the oven with a bit oven mitt on.

My star puffed right up in the oven so your cake might too, but don’t worry. It’ll deflate a bit once you take it out. I’m pretty amazed at how flat this cake is. There’s pretty much no levelling needed if you wanted to make a layer cake.
Take your prizes out of the oven and cool on a cooling rack. Take your sliced orange and squeeze all the juice over your cake. It’s amazing. I’m totally serious. Let the cake stand for a while so all of that juicy goodness can soak into your cake to make it ultra-moist. Hooray for orange juice!

…And cut into this delicious cake with your favourite knife…It looks a lot like cheesecake, doesn’t it? I really love the browned sides. It makes the cake look like it’s so full of flavour 😀
The texture of the juice soaked part is kind of like a light Japanese cheesecake – super moist and soft. The cake isn’t overly sweet. I think it’s pretty damn cool that the cake is mostly only flavoured with zest.
Time to get down to business, so for those of you who are going to try this everyone, here’s the recipe:
Gâteau au yaourt et au orange
(Orange Yoghurt Cake)
Adapted from Foodbeam
Ingredients:
- 1 1/2 cups flour
- 250g plain yoghurt (yaourt nature)
- 1 cup caster sugar
- 1 1/2 tsp baking powder
- a pinch of salt
- 3/8 cups vegetable oil
- 3 eggs
- zest & juice from 2 navel oranges
Method:
- Preheat oven to 180°C. Grease and flour an 8-inch springform pan.
- In a large bowl, sift together flour, sugar, baking powder and salt. Stir in plain yoghurt.
- Pour in oil & eggs, beaten. Mix until combined and lump-free. (Optional: squeeze in the juice of one orange).
- Put mixture into prepared pan and bake 30-35 min or until a skewer comes out clean.
- Cool, then squeeze juice of remaining orange over the cake.
Serves 8
